Friday 23 December 2016

The Not Advent Calendar

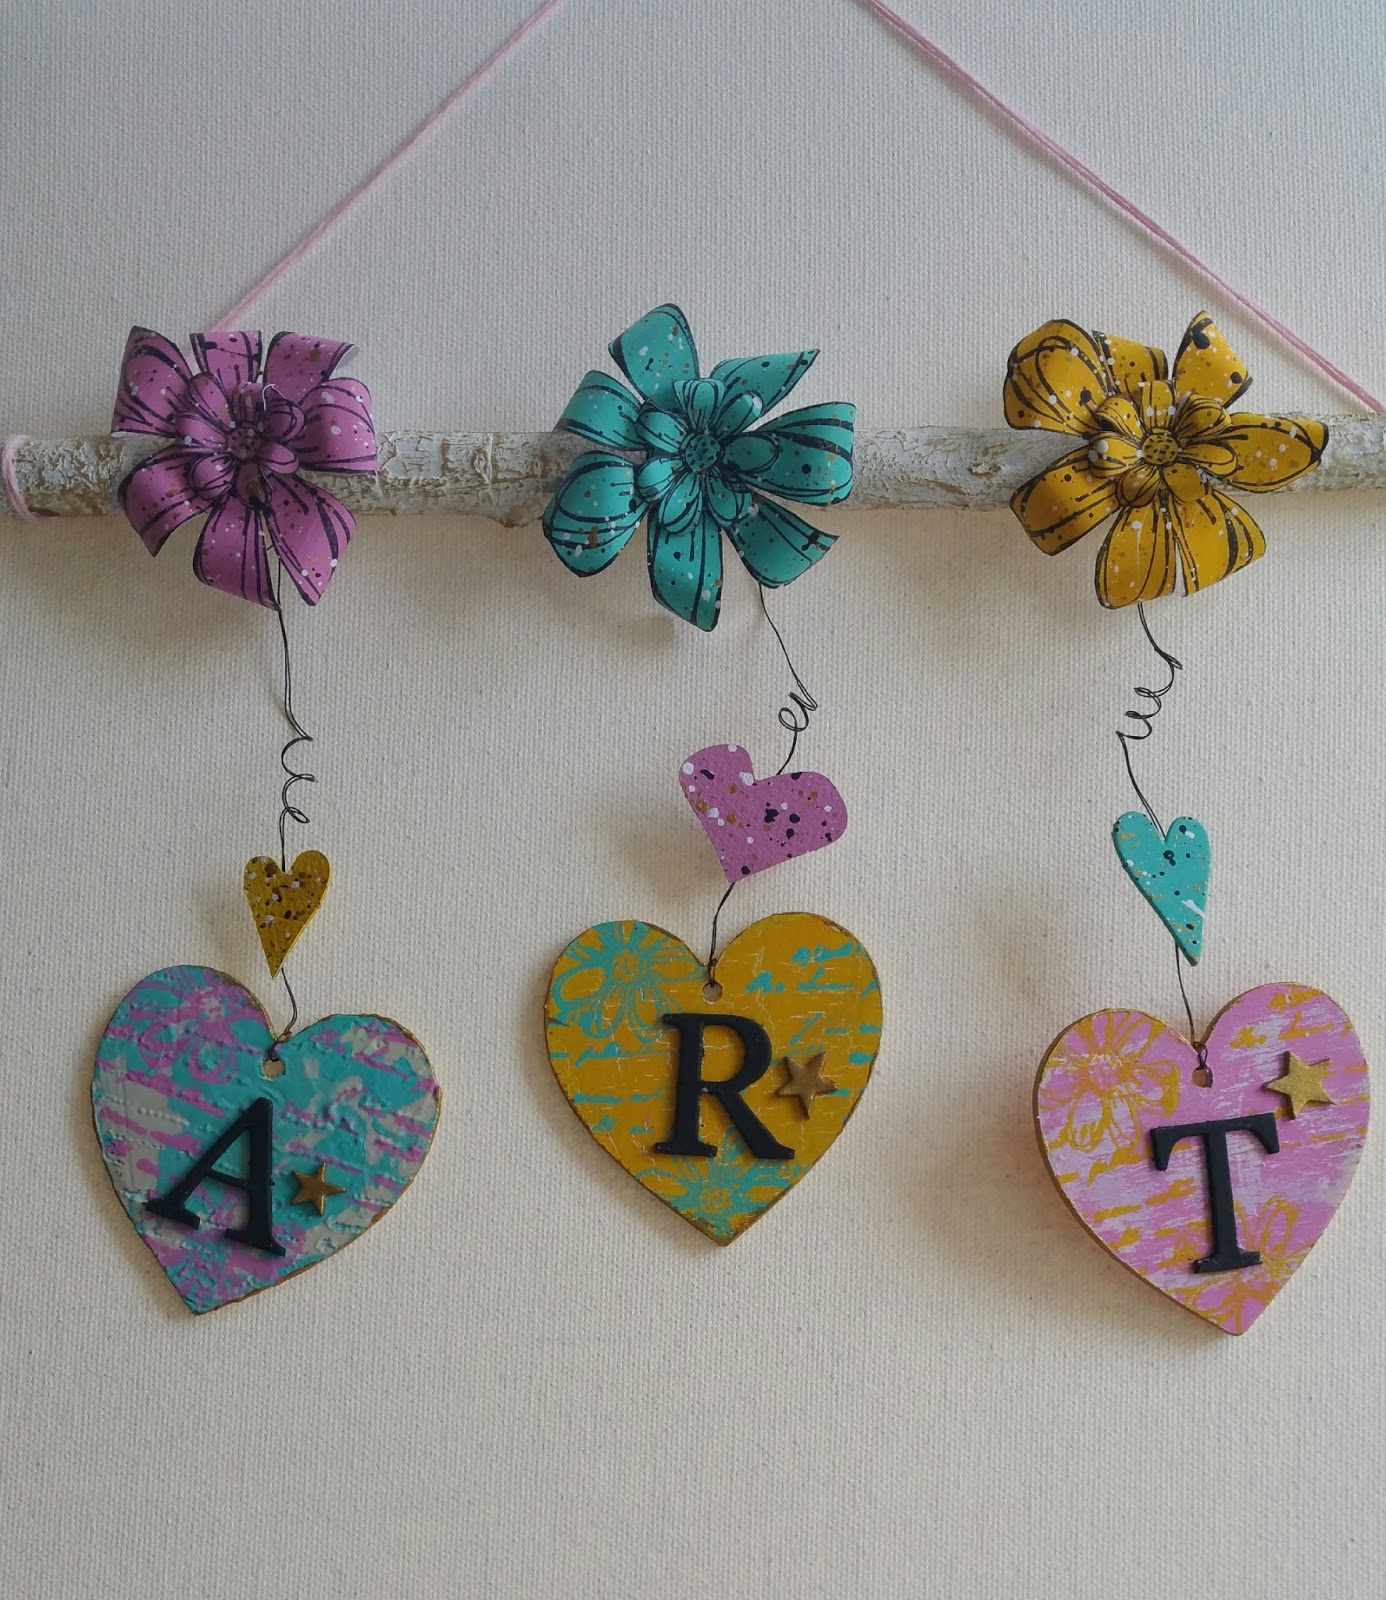
THE NOT ADVENT CALENDAR


Hi All!

This project was meant to be an advent calendar but then became a mantle decoration mainly because of a mistake and then because I thought putting numbers on it would spoil it. 

This project started as a playtime with my friend Carol Fox and the lovely Mandy Chilvers....the idea being we would make the calander. Firstly a huge thank you to Carol and Mandy for all the die cutting they did before I arrived.....it was a lot!!!

Be warned this might be rather long as I am doing this blog for a friend who could not make the day. Also I have an early Christmas gift so I am full of drugs....sounds more risque than  Night Nurse doesn't it? Yep I met the secret santa cold giver...woohoo!!

To begin....are you sitting comfortably?....

Stuff needed...

Die cut arches....used Tim Holtz/Sizzix gothic arches. How many you need depends on how long you want it to be....no smutty jokes!!.....see Night Nurse is fab!!....sorry now on Lemsip.

Modelling paste
Gesso
Matt medium
Tyvek...or an alternative
Paper scraps and washi tape
Paint...I used Decoart fluid acrylics and Pebeo dyna acrylic: decoart colours used were gold, primary cyan, ultramarine blue, dioxazine purple, primary magenta, phthalo green-yellow and interference violet and Pebeo studio acrylic dyna range in irridescent blue/green.
Archival black ink
Cosmic shimmer glue
Stencils byThat's Crafty and Joggles
Stamps by PaperArtsy and Andy Skinner
Images ...I used icon images

Here we go...


So firstly gessoed all the arches. Once the gesso was dry I added torn pieces of vintage papers and washi tape randomly over the arches using matt medium to adhere them.


While the arches were drying I used strips of tyvek to attach the back arches together. I then painted the tyvek and around the front edges of the arches as these would be covered by the images and framing arches so it would be a waste of paint to do the whole area.


This was when I realised my mistake. The initial idea was that there would be twelve arches on each side...I did not leave enough room between each arch to be able to fold it  all together so it became a decoration instead.

When the arches were dry applied modelling paste through a couple of mini stencils by That's Crafty which are brilliant for smaller projects....I used a Moroccan style one and a starry one but the choice is yours. When this was dry I applied a variety of paint randomly over the arches. I used the Decoart ultramarine blue on the tyvek hinges. I used my fingers to apply the paint. Also the Decoart paints have a translucency that I really like and I didn't want to cover up the vintage papers.


When this layer of paint was dry I then added some Pebeo dyna acrylic in  iridescent blue/green and then some Decoart interference paint in violet.


When this was dry I then stamped some text on the arches using Archival black ink. I used one of my favourite stamps for this... a Paperartsy mini text. It is a fab background stamp and its been hard used with paints, inks, bleach and still going strong! Next, using a joggles stencil, I applied Decoart gold paint to the arches after which I used an Andy Skinner texture stamp, which I love, to stamp some more gold paint over the piece.


Using Cosmic Shimmer glue I attached the icon images to the arch surrounds and glued these onto the backing arches. When the glue was dry I edged the whole piece with gold paint. 

Finally I attached some ribbon to each end of the piece and the arch covers. Finished!!!!


FYI most of the products I used I purchased from That's Crafty and I tend to use a lot of recycled stuff so the card used for the arches was a large sheet of waste card from a fish market....thankfully not smelly....well the cats didn't take any more interest in what I was doing than usual....zero!!

If you've still here....thank you muchly and happy messiness to you all xxxxx


Tricia


Sunday 27 November 2016

Another Starry Night....Somewhere Else.....


In for a penny...so second entry for the PaperArtsy alcohol inks and marker pens challenge! As I said on my previous post, I have not used these inks in a while. I don't see myself using them much again either as I much prefer paint although I do like the idea of colouring embellishments with them and I really enjoyed making the snowflakes on this project.

The canvas board was painted several weeks ago when my friends and I had a crafty day and we decided to do a little Christmas canvas. Needless to say I spend most of the day having a natter and drinking copious amounts of coffee with the plan of finishing the canvas that evening.....nope didn't happen! It has been glaring at me since then so this challenge was a godsend.

So the canvas was built up using corrugated card, and onion bag netting which I stuck down with heavy matt gel and then sealed with gesso....black if I recall correctly. I find it easier starting off with a black background and then going lighter. For some reason I really don't like working from light to dark and I never like the result.

I then used a variety of Fresco paints to produce the background....then the crafty day finished, friends went home and my poor little canvas lay there on the table, unloved, until now!!

I then cut some snowflakes using a couple of Tim Holtz dies, one of which had an embossing folder with it which I thought would look good with the alcohol inks...got this ides from the challenge blog post. I cut the snowflakes out of the plastic packaging that the dies came in.

I embossed the large snowflake using the embossing folder. I then used a variety of blue alcohol inks on it. I also coloured a couple of the smaller snowflakes with the inks.

One of the snowflakes was covered in heavy gel and then dipped in blue glass glitter. Another couple were covered in silver glitter.


Then I dripped some inks onto the canvas. Additionally I dabbed some silver glitter around the edge of the canvas which I then tinted with ink in an espresso colour.


Oh I also used an old typewritter key, which I coloured in blue ink and filled with glass glitter, as the centre of my main snowflake flower.

I then attached the snowflakes to the canvas, added a sentiment and....tadah!!

Thanks for visiting and happy messiness to ya xxxxx

Saturday 26 November 2016

PaperArtsy Challenge

STARRY STARRY NIGHT


Hi All, this is my entry for the PaperArtsy challenge on their blog on the theme of alcohol inks and markers.

This was certainly a challenge as I haven't used alcohol inks for years...bought a few feeling all enthusiastic then I was distracted by the next shiny painty product and they were left languishing in a dusty drawer...poor, sad inkiwinkies!!

I think my technique is as dusty as the inkies as I did use several different shades of blue and a couple of different brands...Adirondack and Letraset... and I managed to blend them all into ome shade!!

So I mixed silver glitter with heavy gloss gel and applied it to the acrylic substrate through a Thats Crafty mini starry stencil....onto what would be the back of the finished piece. For those of us new to working on acrylic (2nd project with them for me) you work backwards. So the layer you want to be most visible will be applied first.

When the gel was dry I applied the ink using a blending tool. I then lost the plot a bit and dripped ink directly onto the substrate, then added blending solution, then let it dry and then did the same again! I ended up with quite a grungy background which I liked.


Next I applied some embossing powder around the edges of the triptych. I didn't want a neat look, more like snow on a roof and flakes being blown by the night wind... get me!!!

I then applied some silver paint through a word stencil and when dry I scribbled around the words with a black pen. I'd also embossed a cardboard christmas tree to which I added some sequins.


Silly me...I forgot to say that I attached some old book paper to the back of the triptych with matt medium!!

tadah!!

Thanks for visiting and happy messiness to you xxxx


Friday 11 November 2016

LIVE LIFE LOUD


Hi Everyone,


This is the piece I have entered into the challenge.

I used the following products:

Canvas board
Fresco paints in Inky Pool
Concrete
Bubblegum Pink
Tango
 Eggplant
Yellow Submarine
Limelight
Glass Blue
London Bus
Beach Hut
Little Black Dress
Snowflake
Black Gesso
Archival Ink Pad in black
Andy Skinner stencil
PaperArtsy stencil 020 Emma Godfrey
Grungeboard letters
Glue

To start I covered the board in black gesso. This is my go to gesso as I find it easier make a project lighter rather than start of with a white background although with this technique it does not matter what your base colour is within reason. Apart from canvas board I love using cereal packets and I don't always gesso them so sometimes my background will be grey or kraft coloured...all work.

An apology here for the poor photos. I started this project as a quick run thru for a friend, so was not intending to blog it. Then I thought I may as well get more blogging practice in!!

Also a big acknowledgement to Seth Apter and his fabulous techniques and inspiration. I now 'sethify' on a frequent basis! See...I even invent new words!! OK back on track...

Right once the gesso was dry I picked two colours to do my background. I find that using a dark and a light colour work best for me.I used Inky Pool and Concrete. I poured a litte of both directly on the board and spread them with my brush, trying to keep them in two distinct areas. I then scribbled through the paint with the end on my paint brush...very randomly.


I repeated this process for another two layers, alternating where I put the paint, ie, dark on light then light on dark. At this stage it won't look like much but keep going...


Next I put a little of each paint onto pieces of embossed wallpaper, roughly brushed the paint over it and then dabbed the paper onto my painted board,,,,again, in a random pattern. I also used corrugated card. I alternated applying the colours until I was happy with the background.


Next I edged the board in black using the archival ink. I stencilled stars onto the background using Snowflake after which I stencilled the figure using Little Black Dress.


I then painted the stars in a variety of colours and some grungeboard letters that would be part of my quote.


Finally I used a black pen to scribble round the stars and parts of the background and glued on my quote....Tadah!!

Thank you for popping over and having a look. 
Happy messiness to you all xxxx


Monday 7 November 2016

Typographical Transformations

Hi everyone!

I was really chuffed to be asked to do a blog post for PaperArtsy on the Typography theme. I  chose to use the new Tracy Scott stamps which I love, particuarly for journalling.

For this project I went back to my old faithfuls...coffee cans and a chocolate box...sadly emptied. I love repurposing items and I drink lots of coffee so a match made in heaven!


So I started by gessoing a few tins. I didn't bother with the chocci box as it was already white. Two of the cans were done for later projects. While the gesso was drying I tore up a selection of old papers that had a variety of fonts. I tore them into differing sizes and then attached them to the tin/chocci box using matt medium. I was not too particular about this part so applied them fairly randomly.

When this was dry I decided I wanted the background colour to be a bit more uniform so I applied a coat of Nougat which I watered down slightly.


Then I heat embossed a variety of the ETS01Tracy Scott stamps and a couple of the PaperArtsy background stamps, BG4 and BG5 onto some deli paper using black embossing powder. On the reverse of the embossed side I coloured in the images with a variety of Fresco paints. I chose to do two different colour schemes but I think I am going to have to do another tin to match the chocci box!

For the box I used Sour Grapes, Eggplant, Lavender and Moonlight. For the tin I used Guacamole, Bubblegum, Haystack and Carribean Sea,


I then cut out the images I wanted to use and attached them to the tin/box using matt medium. When this was dry I drew around the images with a Stabilo pencil...one that can be used on different surfaces...after which I used a fine wet brush to blend around the stamped images. I did this because I wanted to add a bit if definition and give a more grungy look.


I added paint drips and splatters in gold onto the can and on the box I roughly sponged the edges in black paint...Little Black Dess of course!! I think I am on myn 6th bottle of this as I used it so much.


When this had all dried I sprayed a shine spray onto both....very heavily and a couple of coats as I wanted to both seal them and give a glossy accent sort of effect.

Tadah!! Finished and had lots of fun. Two more storage containers for my craft room....when I can get into it but! I am going to be brave (or mad...its all perspective no?) and post some photos of my craft room...before and after the mega tidy. This is so I will NEVER let it get so messy again...at least not for a few months.

A huge thank you to Paperartsy for giving me the opportunity to do this.
And a massive thanks to all of you for visiting and happy messiness to you all xxxx

Saturday 27 August 2016

Deligeli Cans

DELIGELI CANS


Hi Everyone!

So how often do we look at sundry items and think 'ooo....I could do something with that!'? I expect we all have our favourite things too. Mine is coffee cans. Having said that I've never been that happy with the end results until now mainly because I have club hands and don't have the flexibility needed to get the effect I want without making such a mess I give up. I still kept on collecting the cans though!!

Then I met the latest love in my crafting life...deli paper. It's brilliant and cheap which is also brilliant! I initially bought it because I had seen other crafters using it with their Gelli plates and I adore my Gelli (called Flopsy) so she needed this. I tried it and fell in love...again.

So why do love it? because it is thin, between tissue paper and copy paper I'd say, it is easier to press into the design of my stencils. It has a semi translucent quality so good for layering. It's stronger than tissue paper so, for me, easier to stamp on and paint without disintegrating into a mucky mess. I also use it, as do others, as scrap paper for cleaning my brayer, stamps and Flopsy. And finally it is cheap...see I am repeating myself, because I loves cheap!!

Needless to say I keep all the paper I use for cleaning up stuff which brings me back to my coffee cans which I use for storing my brushes, pencils, markers etc. Also I have got to tidy my craft room....so I can get in it again...not joking either. So, of course, rather than tidying my craft room I decide to decorate the coffee cans, which will make really useful storage, for when I tidy my room. Right, on with the make.


INGREDIENTS

Deli paper
Coffee cans
White gesso
Black Archival ink
PaperArtsy Fresco paints
Dylusions acrylic paints
Black and white marker pens
Matt medium
A selection of PaperArtsy stamps

I used deli paper that I had saved from previous projects and I cut it to fit the coffee cans which I had painted with gesso.


Whilst the gesso was drying I did some stamping onto the deli paper. Some of the stamping I did with paint and some of it with ink. Here I also used my gelli plate. I brayered the paint on to it and then applied the stamp to the paint.I find this easier than applying the paint to my craft mat as I find I get a smoother layer of paint. Also I then use deli paper to wipe up the remains of the paint and so have more paper to play with at a later date.


I then doodled with the marker pens. When all the stamping and doodling was dry I used the matt medium to attach the paper to the cans and I put a coat of matt medium over the top as well to seal everything. The deli paper did wrinkle in places which I think was due to my technique but I rather like that effect although its not very noticeable.  I also put a bit of black gesso around the top and bottom rims of the cans and painted the lids with black gesso. 


I really enjoyed making these as it was really easy and relaxing as they did not have to be perfect. they will be used to store my beads, shells and beach glass....and I will need more cans....happy days!!!

If you have read this far, thank you very much and I hope you all rush out and buy deli paper!

Cheers and messy crafting to all xxxx

Tricia


Wednesday 13 July 2016

BLINGGED UP BLOSSOMS

BLINGGED UP BLOSSOMS


Hi All....

Am I excited.....YES I AM!!!!  I was chosen to be one of the PaperArtsy 3UP team. Once I had finished dancing on my craft mat, woohooing and generally scaring the cats and neighbours I got to work.

Now I have to be a bit of a sycophant here as I adore PaperArtsy and their products and have been using them ever since I began crafting as well as going on various workshops by the PaperArtsy team which I so recommend. I always learn a new way of using their products and come away with yet another gorgeous item to find a home for.


I was sent a lovely selection of products to use and supplemented this with items from my own stash.

So here goes...lets get messy!!


Magical Ingredients

Infusions
Orange County
Blackcurrant
A Bit Jaded
Violet Storms
Are You Cerise

Fresco Paint
Bubblegum
Nougat

Grunge Paste
Satin Glaze
Crackle Glaze

White Embossing Powder
Black Archival Ink
A selection of PaperArtsy Stamps
Stencils

The infusions are a new product which I have not used before so I was really looking forward to having some fun with them and experimenting with different applications. For this project I used the infusions in four different ways and I am sure there will be lots more from my fellow 3UPers which I'm looking forward to trying.

I used a cardboard plaque as my base which I painted in bubblegum. When dry I applied a very thin coat of crackle glaze. I dried this with my heat gun after which I added a thin coat of nougat paint. I was careful to apply this layer very lightly and to not over brush it so that I would not get a patchy crackle. There are some good videos on the PaperArtsy YouTube channel showing how do do this which helped me.

Next I did some stamping on the plaque which I then embossed in white.


I mixed some of the A Bit Jaded Infusion with some Grunge paste and applied this through one of my PaperArtsy stencils. I really liked the result. A great matt finish and the colour was quite vintage which I love. The products were easy to mix and an advantage was that by adding the infusions it did not alter the consistency of the grunge paste.

As the photo above shows I like to cut up my stencils! I find them easier to position where I want them

While the paste was drying I painted several pieces of white card with the satin glaze. I then sprinkled on  some infusions....and here less is best (boy do I find this hard to do!) which I then brushed through the glaze. This gives a lovely striated effect, showing the variety of pigments in each of the infusions as well as producing a subtle translucency. When this was dry (I let this dry naturally) I stamped the flowers and stems on top using black Archival ink and the cut them out.

I then sprinkled some are you cerise infusions onto some surgical gauze and spritzed with water. This gave me a fabulous vintage look and a luscious pink shade.

To add a bit more texture and depth and to knock back the crackle base I sprinkled on some violet storms infusions directly onto the plaque and spritzed with water, wiping back some areas , leaving it to dry naturally.

Finally I added all the elements to the plaque, adding a lot of bling!

Tadah!!!

EXTRA BITS


In the above photo I've shown a few examples of playtime with the infusions. On the larger piece I had made a spritz of two infusions....the Are You Cerise and Violet Storms and sprayed this through a couple of stencils. This resulted in a lovely soft, misty effect.

On the tag I I used the metallic glaze over a grunge paste and infusions background and this brought out the walnut stain in the infusions quite nicely, giving an aged effect to the background.

On the last piece I was quite liberal with the infusions. I sprayed a piece of card with water, applied the infusions, spritzed with water and then covered with clingfilm and left it to dry. Love the effect!

AND FINALLY....


This was such fun to do. A huge THANK YOU to PaperArtsy for this opportunity. A massive HUG to Darcy Wilkinson who has had to deal with my panicky emails and wonky photos!!

In all the excitement of being picked for this project I forgot I was going on holiday. I thought there would be no problem doing my blog on holiday....WRONG!! For some reason my tablet wanted to write it all in Balinese....as I only know three words, please...thank you and !!?!....this did not help. So I had to write this on my return which was a bit of a rush so my apologies for any mistakes and photo quality. Actually I might have been better writing it in Balinese !!!

Anyhoo, thanks for visiting and happy messiness to all xxx


Thursday 12 May 2016

Grrrr!!

Grrrrrr....


I have entered this into the Stampotique Designers Challenge SDC 244.

This journal page is called Grrrr...and rrrrr....because I like to be literal and I was in a very grrr mood the other day. Don't know why and now back to my happy place but I did get the idea for this layout. I used one of my favourite Stampotique stamps...I think its called Angel Boy (?) Here goes....

Recipe

white card
black gesso
white gesso
DecoArt modelling paste
DecoArt fluid acrylics in cadmium red hue and primary magenta
various stencils
Spectrum Noir pencils
Archival ink in black
Stampotique stamp
white pen
glue

I used the black gesso to cover the card, Then I added a few drops of the fluid acrylic to colour the paste and applied this through the stencils. I also applied white gesso through a stencil as well, I also applied white gesso over the top of the stencilled areas using a palate knife.
I added white gesso circles using the top of one of the fluid acrylic bottles.
I stamped my image, coloured it with some Spectrum Noir pencils and cut it out. Also printed out my quote and edged it with black Archival ink.
I then scribbled inside the circles with a white pen.
I glued on my image and quote and did a bit more scribbling.
Tadah!

If you've read this far...thank you very much!

A little segue... who else has spent ages trying to open a garbage bag from the wrong end?!!

Friday 29 April 2016

WHITE SPACE


Entered into the PaperArtsy Blog challenge at http://blog.paperartsy.co.uk/2016/04/2016-topic-8-white-space-challenge.html

Hi Everybody. 

Well, makes a change, a typical April week....sunshine, rain, sleet, sunshine, more sleet....and start all over again! It's such a shame as I haven't been able to do the gardening and have had to get covered in paint instead. Tragic! I was joking about the garden though. My garden and I have an understanding...we leave each other alone unless absolutely necessary.

This week I'm entering the PaperArtsy challenge using rubbish....crafty, creative rubbish though! This was for me a 'challenging' challenge as white space can be a bit intimidating....down right scary I say! So I put my big girls pants on and set about challenging my 'eeeeek scary' head.

I was at the wonderful monthly craft group that I go to, run by the amazing Lynne Gilbert, trying to create a thing(or several) of beauty but really having a good natter and nosing at what all the other talented women were making whilst enjoying the coffee and nibbles that Lynne supplies( yes...I do leave some for others, my mum taught me well....).

Anyhoo, Lynne was showing us a technique that Kim Dellow uses which I must say is FABULOUS!!! My friend Debbie had finished with the repositional tape I'd shared and said that, knowing me, I'd probably make use of it. This was true. Last club I found a bit of a stick which I took a liking to and used it to make a hanging hearts thingie. I also love rusty bits of metal, onion bags, sea glass, shells, cereal packets, bottle tops, beer tops, computer parts,,,,,,etc. All donations welcome by the way....

So I had these pieces of painty tape, lovely colours on them too. I stuck them on a piece of card, in a creative and arty way of course, to take them home with me. I rather liked how they looked on the card but did not really know what I would do with them.

When I saw what the latest PaperArtsy challenge was I immediately thought of the tape...and this is how I made this journal layout....

Ingredients

repositional tape
PaperArtsy Fresco paints...variety of colours
JOFY flover stamps
Stampotique sentiment
pen and black ink
Cosmic Shimmer glue
Archival ink in black

I had already put the tape on the card so that part was done. As the colours were so lovely and bright I decided to use flowers with it. I like to make dimensional pieces ... so loads of flowers needed. I used JOFY flowers which I love, particularly as there are three sizes, all slightly different. 

I painted a piece of card, using the Kim Dellow technique and the same colours that were used on the tape. I then stamped the flowers onto the card and cut them out. I then stamped the sentiment onto a piece of white card, cut it out and edged it with the black archival.

I matted the tape card onto apiece of A4 white card and then stuck on the flowers. After this I flicked some black paint onto the whole piece and then drew and ink border and attached the sentiment....tadah!

Now for an apology...sorry about the mixed bold and not bold sections, can't remember how to correct it. If I haven't put in links correctly, my bad!

And now for the important bit, thank you for taking time to read this and I hope I made you smile...also happy with the odd groan instead though.

Happy crafting to all (and gardening...) xxx

Saturday 16 April 2016

YELLOW

Inspired by the More Mixed Media Challenge


Hi All....

Today is very much an April showers day.....and dull, really dull! Plus I have a cold...grrr. I must say I'm looking fab though with a bit of tissue stuck up one nostril as that one is a leeky tap at the mo!! I know...gross image....back into my corner goes I!!

So to cheer my day I altered this sweetie tin....

Recipie

Gesso
Acrylic Paint
Ink Pad
Stamp
Sweetie Tin

Firstly I gessoed the tin, then used a mix of DecoArt fluid acrylics in primary yellow, cadmium orange hue and cadmium red hue which I applied with a brush any old how...started with the lightest colour.
Then I stamped onto the tin using a selection of PaperArtsy stamps (primarily from the Eclectica  range), using Snowflake Fresco paint. I then spattered the tin with Little Black Dress.
I painted a piece of card with primary yellow and stamped the large Stampotique flower several times and the little one too (so it didn't feel left out...) with black Archival ink.
I curled the flower petals, layered them up, stuck them together, glued the result to the tin ....
THE END

Well, not quite. Big thank you to all who read this far. 
THANK YOU!! xxxx

Friday 8 April 2016

FLOWER POWER


Hi All....

Feeling sad....last journalling club, run by the very talented # Carol Fox, was held on Monday....waaahhhhh! Also my crafty mojo decided it needed a break and up and left! So was not in the best of moods on club night. Having said that Carol had designed a wonderful page to inspire us.

Anyway to cut a short story shorter....I was outside missing my e-cig (battery ran out!!), debating which of my car tires I was going to kick, when I spotted a broken piece of a rose bush and I thought...hummm I could do something with this. Earlier I had been eyeing a large wood pallet all on its lonesome by the recycling bins but alas it was too big to fit in my boot. So I consoled myself with my little rosewood stick.

Did I mention that it was a magic rosewood stick? Well it was because as soon as I got home my mojo returned and I had the idea for the little mobile above....using the magic rosewood stick!

Products used:

1 magic rosewood stick
#PaperArtsy Fresco paints in bubble gum, caribbean sea, yellow submarine, snowflake and little black dress
#PaperArtsy crackle glaze medium
#Decoart media fluid acrylics range metallic gold
Gesso
Cosmic Shimmer glue
3D gloss gel
#Stampotique flower stamp...large and small.
#PaperArtsy text stamp (one of the mini ones....a definite favourite go to stamp!)
#Ranger Inc grungeboard shapes and letters
white cardstock..A4
MDF hearts
thin wire
cotton thread
beeswax pellets
#Archival ink pad in black

So, firstly I gessoed the MDF hearts and my magic stick. While these were drying I painted a sheet of cardstock with the Fresco paints in bubblegum, yellow submarine and caribbean sea...roughly covering a third of the card for each colour. I then stamped on the Stampotique flowers, a mix of large and small ones and then cut them all out.

Going back to the hearts, I painted them in the Fresco paint. On one of the hearts I applied crackle glaze, very thinly, with a pallet knife and when that dry I painted another colour on top. On another heart I melted on some beeswax and painted over that when it had dried. I then heated it again and, using a baby wipe, removed some of the wax and paint. I then heated it briefly again to smooth any bumps in the remaining wax.

Next, using the PaperArtsy stamp I stamped text on each of the hearts using an alternate colour from the base colour. Using the same paint colour I'd used for the text, I stamped flowers on the hearts using the small Stampotique flower. I also painted three grungeboard hearts.

Next I painted the edge of the MDF hearts and some grungeboard stars with the gold metallic paint. Then I painted the grungeboard letters in little black dress and attached them to the hearts with glue.

Back to the cut out flowers....I spattered them with the gold metallic, little black dress and snowflake. When dried I curled the petals and stuck a small flower in the centre of the larger one using the cosmic shimmer glue.

I also dry brushed the gold metallic paint onto my magic rosewood stick.

Using some thin black wire I attached the MDF hearts to the magic stick. I then attached the flowers to the stick using 3D gel...this also helped to keep the wire where I wanted it.

Finally (phewww!!) I tied on some pink thread to hang it up with.

THE END

If you have read this far thank you very much and hope I gave you the odd titter xxxx

Hugs and things,
Tricia xx

BLOG CHALLENGES

I have entered this into the That's Crafty blog challenge http://thatscraftychallenges.blogspot.co.uk/2016/04/all-things-bright-and-beautiful.html

I have also entered this into the Stampotique design challenge which can be found here


Tuesday 5 April 2016

RESISTS


Hello All

Well, thus far my adventures in Blogland have been a bit of a nightmare both for me and the brave souls who have been trying to bring me into the 21st century!! So firstly a huge thank you to Debbie Whatley and Carol Fox for their hours of help and undying patience....I'm really going to be spending a fortune on flowers now!! Secondly, all the mistakes are of my own making....there will be loads!

So, having consumed copious amounts of coffee (should have added rum...lots of rum...) and as a way of avoiding the rest of the housework I'm posting a wee index card on which I practiced using masking fluid as a resist for the PaperArtsy blog challenge on...resists! You can find details of the challenge here...http://blog.paperartsy.co.uk/2016/04/2016-topic-7-resists-challenge.html

OMG...I think I've done it....added a link...woohoo!

Recipe

1 index card
masking fluid...fineliner application type
selection of PaperArtsy Fresco paints and Decoart media range paints.
fingers...one will do.

I painted the card with Fresco paint in Mermaid. Adore this colour! Dried it with my heat gun. Then I applied clear gesso on top and dried this layer. When it was completely dry I then applied the masking fluid in what I hoped was an arty way....then waited for it to dry...and waited ....had coffee...waited...

When it was finally dry I applied paint over the  masking fluid. I used a mix of colours, mainly dark blues, wiping some away with a wet wipe, drying in between layers.

Finally....rubbing off the masking fluid with my finger....very useful tool. Thankfully I have several as the first one I used got worn out.

Oh yes, then printed out some words and glued them onto the card after edging them with black Archival ink.

Some of the words come from a wonderful song by Bruce Cockburn, 'The Whole Night Sky'.

So that's it....if you read this far, thank you very much.

Dim bulb moment today.....spending five minutes trying to open a bin bag from the wrong end!

Thursday 11 February 2016

Ego Challenge.

Hi and welcome to my messy heaven.

So this is my first blog, my first blog post and I must confess to feeling rather nervous , particularly as I have forgotten where I have to go to edit it!  My thanks in advance for being here and I hope you enjoy what you see.

Before I go any further I need to give a big THANK YOU (see....big!!) to the amazing Carol Fox, who valiantly attempted to teach me how to set this up. Any muck ups you might find are my contribution to the process....Carol had to leave as she had a migraine coming on!! Be warned....I have this affect! On a serious note...of which there will be few, I am very grateful to Carol for the time she took to help me with this. I will be putting a link on here to her blog , one I often visit as she is a very talented artist and inspiring educator and a rather lovely person to boot (boy will she owe me a glass of wine or many). 

Me

As the name suggests I am the naughty one on crafting workshops, getting worse with age and loving every minute of it. I love crafting even when I'm incredibly frustrated and 'sticking a butterfly' on it, or anything else, would be pointless. I was drawn into this wonderfully creative world by the other love of my life...diving. I wanted to find a way to get more enjoyment of the many images I have of fish, places, more fish, strange wriggly things, fish...

Scrapbooking caught my eye. A few (cough..) years later and I have yet to finish my first scrapbook as I have a profound inability to cut a straight line....with anything...and boy have I tried! Along the way I found out about so many creative processes, met many fabulously talented people and whilst having enjoyed many things I really, really, REALLY love mixed media...so that's what I do.

I hope you enjoy this blog. Please do check out the links I put up (when I figure out how to....again!...sorry Carol!) . They are there because I enjoy them or I have used their stuff when I am making my usual chaotic mess. I hope you do too.

 Just spotted my first mistake...'ego challenge' refers to writing this first post....it's definately been one! Oh well...onwards and upwards....happy messy time to you all xx